
AODD Pump Rebuild Guide: Disassembly, Inspection & Assembly Step by Step
Table of Contents
A full AODD rebuild is a two-hour job with a socket set, a torque wrench and this sequence — and it returns a pump to spec for $60-120 in OEM-compatible parts instead of $400-1,500 for a new unit. This guide walks the rebuild the way a service technician actually does it: disassembly order that protects the parts you're keeping, inspection points that decide what gets replaced, and assembly steps that make the rebuild last. Follow it once and the next rebuild is an hour.
Why Rebuild, Not Replace
The economics are the first argument: a rebuilt 2" pump costs roughly 10-15% of the new-pump price in parts, plus two hours of labour. The second argument is availability — a rebuild kit is on the shelf today; a new pump may be weeks out. The third is that most AODD "end of life" is actually three worn parts: diaphragms, valve balls & seats, and the air valve kit. When the wetted body is sound — no cracks, no chemical attack — the pump has years of service left after a rebuild.
Rebuild when the body is sound and the parts bill is under ~60% of a new pump. Replace when the body is cracked or warped, or when the media changed beyond the body material's rating. A rebuild on a broken body is throwing good parts at a dead pump.
Tools & Preparation
The full rebuild needs remarkably little — and all of it is standard shop gear:
- Socket set (metric and imperial — AODD pumps mix fasteners; check the manual)
- Torque wrench (the single most important tool — see assembly below)
- Soft-faced mallet (plastic bodies crack under steel hammers)
- Feeler gauge (for diaphragm alignment checks)
- Thread locker (medium strength, for shaft nuts)
- Lint-free cloths and a clean bench — one grain of casting sand in a valve chamber is a rebuilt pump that leaks
- Pen and camera — photograph each stage; reassembly from photos beats reassembly from memory
Preparation rules: isolate and bleed the air supply, drain and flush the pump (media compatibility — flush with the solvent the manual specifies), and tag the pump with its model and serial before you touch a bolt. Every rebuild starts with the nameplate photo — it's the reference for every part number you'll order.
Safety & Flush Procedures Before Disassembly
The rebuild starts before the first bolt turns — with the fluid inside the pump made safe. Three non-negotiables:
- Isolate and depressurize the air supply. Lock out the air valve and bleed the line. An AODD holds residual air pressure in the chambers; releasing it is the difference between a rebuild and a flying manifold.
- Drain and flush the wetted side. Flush with the solvent the manual specifies for your media — water for water-based media, the appropriate solvent for chemicals. The media inside the pump is concentrated at the last service conditions; a pump that handled 98% sulfuric needs more than a rinse.
- PPE per the media SDS. Gloves, eye protection, and the correct respirator where the media demands it. The pump's chemical resistance doesn't extend to your skin.
The flush also serves the rebuild: a clean, flushed pump is easier to disassemble, and the flushed state prevents media residue from contaminating the new parts as you fit them.
Fastener & Thread Notes
AODD pumps mix metric and imperial fasteners across brands and generations — and the wrong socket strips heads. Two notes that save the rebuild:
- Check the manual's fastener list before starting. Wilden-style pumps use imperial on many older bodies; ARO and European copies often run metric. A stripped manifold bolt on a plastic body is a body repair, not a bolt swap.
- Thread locker only where the manual says. The shaft nuts take medium-strength locker; manifold bolts usually don't (they're re-torqued warm after the first run). Locking everything is as wrong as locking nothing — disassembly next time becomes a fight.
- Anti-seize on PTFE threads. PTFE bodies gall catastrophically on assembly; the manual's specified anti-seize is mandatory, not optional, on PTFE-bodied pumps.
Fastener discipline is invisible when it works and expensive when it doesn't — a seized thread on a $400 PTFE body turns a rebuild into a body replacement.
Disassembly: The Order That Works
The order matters because it protects the parts you keep and reveals faults in sequence:
- Air section first. Remove the air valve cover and the valve assembly. Inspect the spool, seals and O-rings while it's out — this is the diagnosis moment for hunting and stalling pumps.
- Manifold and outer plates. Remove the suction and discharge manifolds. Note the gasket condition — hard, cracked gaskets explain air-in-discharge symptoms.
- Diaphragm stack. Remove the outer diaphragm plates and the diaphragm assembly. Keep the stack together per side — the shaft and inner plates stay as a unit unless the shaft seals are leaking.
- Valve chambers. Extract the valve balls and seats from all four chambers (two suction, two discharge). Inspect each ball against its seat — the wear pattern tells you whether this was normal wear or a material mismatch.
- Shaft and air chamber. Only if needed — if the shaft moves freely and the air-side seals are intact, leave the centre section together. Unnecessary disassembly of the centre section is where rebuilds go wrong.
The rule: take apart only what the failure demands. A diaphragm-and-balls rebuild doesn't need the centre section touched. The more you disassemble, the more seals you disturb — and every disturbed seal is a potential new leak.
Air valve disassembly detail
Remove the valve cover fasteners evenly, not one at a time — uneven removal warps plastic covers. Lift the cover straight off and photograph the spool orientation before touching it. The spool has a specific assembly position; photos plus the manual's exploded view are the insurance against a reversed spool, which makes the pump run backwards or stall instantly. Check the spool O-rings and the pilot valve (on models with a separate pilot) for flat spots — flat seals are the classic hunting-pump cause.
Diaphragm stack disassembly detail
The diaphragm stack on each side consists of the inner plate, diaphragm, and outer plate, held by the shaft nut. Hold the shaft from turning with a wrench on the shaft flat, then break the nut loose with the correct-size socket — a deep socket is usually required. Keep the stack parts together per side and label them left/right; the diaphragms come off as a pair and go back as a pair. Inspect the shaft nut threads and replace the thread locker — never reuse the old locker on a wetted assembly.
Valve chamber disassembly detail
Valve chambers sit at the top and bottom of each manifold. Remove the chamber caps and lift the balls out — note which chamber each ball came from, because the wear pattern per chamber tells the story (heavy wear on one suction ball vs all four suggests a system issue, not a parts issue). The seats are usually pressed or screwed into the manifold; inspect the seat pockets for debris before fitting new seats.
Inspection: What to Measure, What to Replace
Inspection decides the parts bill. Work through each item with a clear pass/fail:
| Component | Inspect For | Replace When |
|---|---|---|
| Diaphragms | Cracks at the flex point, blisters, swelling, pin-holes, hub tears | Any visible defect — diaphragms are never repaired, always replaced (as a pair) |
| Valve balls | Chips, scoring, flattening, permanent deformation | Any chip or flat spot; replace all four as a set with the seats |
| Valve seats | Wear rings, cracks, embedded debris | Visible wear ring or damage — always with the balls |
| Air valve spool & seals | Scoring, flat seals, hardened O-rings | Any scoring or seal flattening — the kit is cheap insurance |
| Manifold gaskets | Hardening, cracking, compression set | Any hardening — gaskets are single-use in practice |
| Body (wetted) | Cracks, crazing, chemical attack, warped bosses | Body damage = no rebuild — the pump is done |
| Shaft & centre seals | Leaks, scratches, free movement | Only if leaking or scored — otherwise leave the centre section assembled |
A useful habit: photograph the worn parts against the new ones before assembly. The comparison is your record — and it's the evidence you need if a rebuild fails prematurely and the supplier asks what the old parts looked like.
Assembly: Torque, Alignment & Sealing
Assembly is where rebuilds either last years or fail in weeks. Four rules carry 90% of the outcome:
Rule 1 — Torque to spec, not to feel
Plastic bodies are the trap: PP and PVDF bosses crack under "good and tight". Use the torque spec from the manual — typically 20-40 N·m on manifold bolts for 1-2" plastic pumps, and re-torque warm after the first run. Steel-bodied pumps take more, but still use the spec. Over-torquing is the #1 cause of "rebuilt pump weeps at the manifold".
Rule 2 — Center the diaphragm stack
A diaphragm assembled off-centre, or with the shaft nut unevenly torqued, is a diaphragm with a guaranteed hub crack in weeks. Center the stack, seat the plates evenly, and torque the shaft nut in a cross pattern to spec with thread locker. The feeler gauge checks the gap evenly all around.
Rule 3 — Balls and seats go in matched sets
Never mix a new ball with a worn seat — the wear rings don't match and the check valve won't seal. All four chambers get the same treatment: new balls, new seats, clean chambers. Debris in one chamber during rebuild is a self-inflicted leak that's maddening to find later.
Rule 4 — Lubricate, then test the valve by hand
Lightly lubricate the air valve spool and O-rings with the recommended lubricant during assembly, and manually shift the spool before closing the cover — it should move freely. A spool that's tight by hand will hunt under pressure.
Bench Test Before Reinstall
Never reinstall a rebuilt pump without a bench test — the five-minute test catches 90% of assembly errors:
- Air-leak check: apply air pressure with the discharge blocked; listen for air escaping at the manifold and air section. Any hiss is a gasket or torque problem — fix now, not on the line.
- Stroke test: run dry with the suction in water or a bucket. The pump should cycle evenly with no hunting.
- Discharge check: confirm steady discharge and full prime — the pump should self-prime and hold prime.
- Pressure check: block the discharge and confirm the stall pressure matches the air supply — a pump that stalls early has an air-side problem.
- Re-torque: after 30 minutes of run, re-torque the manifold bolts warm, per Rule 1.
The bench test is also the moment to log the rebuild: date, parts replaced, part numbers, torque values. Next rebuild, the log tells you the real interval for your duty.
The 7 Rebuild Pitfalls
- Over-torquing plastic bodies — cracked bosses and weeping manifolds, weeks later.
- Off-centre diaphragm stacks — hub cracks in weeks.
- Mixing new balls with worn seats — check valves that never fully seal.
- Skipping the bench test — assembly errors discovered on the production line instead of the bench.
- Disturbing the centre section unnecessarily — every extra seal disturbed is a new leak risk.
- Using the wrong elastomer — a rebuild with the same material that failed is a rebuild that fails the same way; re-check the media against the material guides.
- Not photographing the old parts — losing the evidence that would have told you (and your supplier) what actually failed.
What's in a Full Rebuild Kit
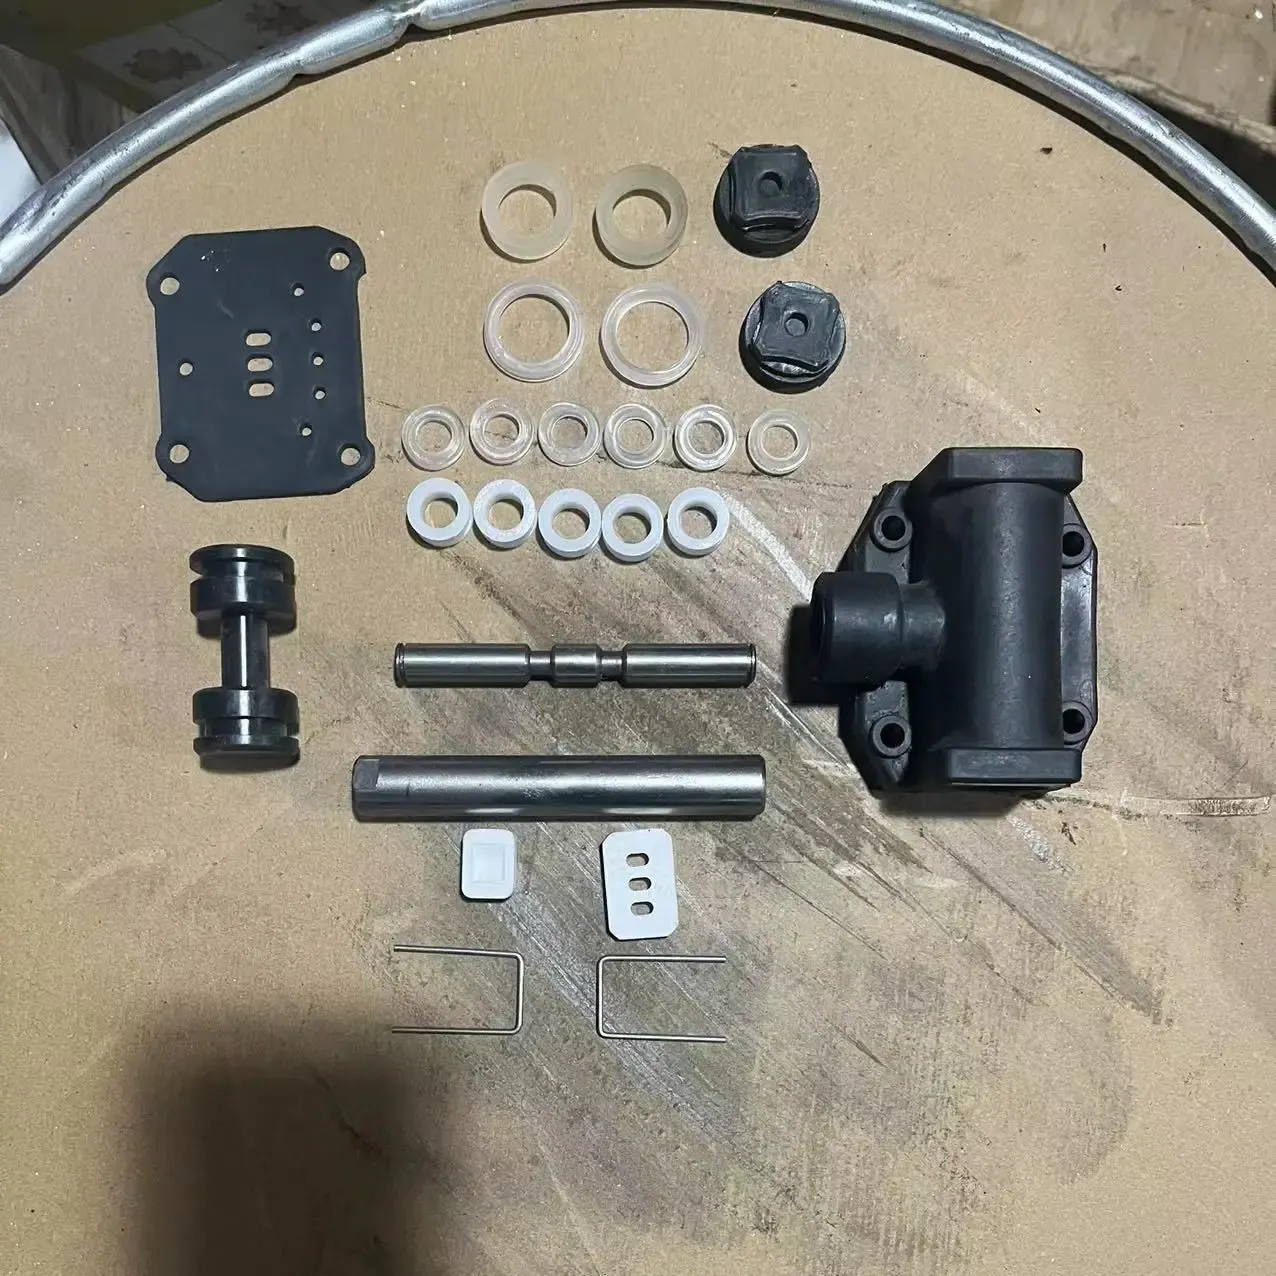
A proper rebuild kit covers every wear part so you don't re-open the pump next month for the one part you skipped:
- Diaphragm pair (material matched to media — see the diaphragm comparison)
- Valve balls & seats, all four chambers
- Air valve kit (spool seals, O-rings, gaskets)
- Manifold O-rings / gaskets
- Thread locker and lubricant (the two consumables everyone forgets)
OEM-compatible rebuild sets run $60-120 depending on size and material; OEM equivalents run $200-400. For plants running several pumps, pre-built per-model kits cut rebuild labour in half — see our spare parts kitting service.
Rebuild Kit vs Individual Parts: Which to Buy
The rebuild is only as complete as the parts you bought. Buying individual parts because the kit "looks expensive" is false economy when the skipped part fails a month later and the pump comes apart again:
- Buy the full kit when — the pump is already apart (you're rebuilding anyway), the duty is unchanged, and you want the rebuild to last the full interval. The kit premium over individual parts is usually $10-20 — cheap against a second teardown.
- Buy individual parts when — the diagnosis is a single fault (e.g. a chipped ball from debris) and the other parts are recently replaced with logged dates. Even then, inspect the rest while you're in there.
- Stock a kit per pump size — plants with several pumps keep one rebuild kit per size on the shelf. The pump that fails on a Friday becomes a two-hour fix instead of a weekend of waiting for parts.
The kitting math is compelling at fleet scale: pre-assembled per-model kits cut rebuild labour roughly in half and eliminate the "which part number was it" delay. That's the logic behind our spare parts kitting service — you get a shelf-ready kit, we get a repeat order. Everyone wins.
Rebuild Records & Interval Tracking
The single cheapest improvement to any maintenance program is a rebuild log — one line per rebuild: date, pump model, hours or cycles since last rebuild, parts replaced with part numbers, and the failure symptom that triggered it. Three things fall out of that log:
- Site-specific intervals — the manufacturer's schedule is generic; your log tells you the real interval for your duty. A pump that rebuilds every 4 months in halogen service shouldn't run the "annual" schedule.
- Application problems — a pattern of diaphragm failures across pumps in one service means the material is wrong for the media, not the parts. The log exposes it; the material guides fix it.
- Spares planning — intervals turn into a stock forecast: if the average is 6 months and you have 4 pumps, you need 2 kits/year on the shelf, not 1.
Fifteen seconds per rebuild entry. It turns every future diagnosis from guesswork into a comparison — and it's the difference between a maintenance program that reacts and one that plans.
When a Rebuild Isn't Enough
A rebuild restores the wear parts; it doesn't fix application problems. Three cases where the rebuild will fail again unless the system changes:
- Material mismatch — diaphragms failing every few weeks in aggressive chemistry aren't bad parts, they're the wrong material. Rebuild once with the correct elastomer (or one-piece PTFE in halogen service) and the interval stretches to months.
- Undersized pump — a pump running flat-out at the top of its curve wears fast and stalls on peak demand. The fix is a size up or an air-system upgrade, not more frequent rebuilds.
- Air quality — wet, dirty air kills air valve kits regardless of rebuild quality. A dryer and filter at the supply is a one-time fix that extends every air-side interval.
The rule: diagnose the application, not just the pump. If a rebuild fails early, don't rebuild again — ask why it failed early. That question is where the money is saved.
FAQ
How long does a rebuild take?
Two hours for a first-timer working from this sequence, under an hour once you've done one. The bench test adds five minutes and is never skipped.
Do I need special tools?
No — sockets, a torque wrench, a soft-faced mallet and a feeler gauge cover a full rebuild. The torque wrench is the only non-negotiable.
Can I rebuild only the diaphragms?
Yes — if the diagnosis says diaphragms only, do diaphragms. But inspect the balls and seats while you're in there; skipping a worn set means a second teardown in a few months.
Why did my rebuild fail within weeks?
Three usual causes: over-torqued plastic bodies, off-centre diaphragm stacks, or the wrong elastomer for the media. Work the seven pitfalls list against your rebuild.
Should I rebuild or buy new?
Rebuild when the body is sound and parts are under ~60% of new-pump price. Replace when the body is cracked or the media outgrew the body material. The decision framework in the troubleshooting guide covers this in detail.
Can I rebuild a PTFE-bodied pump the same way?
Yes — the sequence is identical, with two extra cautions: PTFE bodies are softer, so torque values are lower and over-torquing is more damaging; and PTFE threads gall easily, so follow the manual's fastener guidance and use the recommended anti-seize where specified.
Do I need to replace the gaskets if they look fine?
Yes — gaskets and O-rings are single-use in practice. They look fine until they're re-compressed, then they leak. The $2-5 gasket set is the cheapest insurance in the whole rebuild.
What's the biggest mistake first-timers make?
Over-torquing. Every first rebuild I've seen weeps at the manifold because the bolts were done "good and tight" instead of to spec. Get the torque wrench out — it's the difference between a rebuild that lasts and one that leaks next week.
Does a rebuilt pump need a break-in period?
Not a formal one — but run the first 30 minutes at moderate speed, re-torque the manifold warm, and re-check the air valve action. That warm re-torque catches the compression-set of new gaskets and is the step most skipped.
Where do I find the rebuild kit for my pump?
Send your pump model and media to our contact form, or browse the parts section by part number — every reference page shows the material direction and fitment notes so you can confirm before ordering. Kit or individual parts, the reference pages carry the confirm-model note that prevents wrong-part rebuilds.
Conclusion & Next Step
A rebuild is the highest-ROI maintenance act in the AODD world: two hours, $60-120 in parts, and a pump back to spec — provided the order is right, the torque is right and the bench test is done. The sequence here is the one that protects the parts you keep and catches the mistakes that kill rebuilds. Disassemble only what the failure demands, inspect against the pass/fail table, torque to spec, and test on the bench before the pump ever sees the line.
Ready to stock the rebuild kit? Browse the parts section for diaphragms, valve balls & seats and air valve kits by part number, or send your pump model and media to our contact form — we'll assemble the right kit and confirm fitment within 24 hours.
NEXT STEP
Need the Right AODD Pump or OEM-Compatible Parts?
Send us your media spec or part number — our engineers confirm fitment and quote within 24 hours.
Written by
Ray ChanAODD Pump & Spare Parts Specialist. Ray helps global buyers source factory-direct air-operated double diaphragm pumps and OEM-compatible replacement parts.